Creating a mobile app is a multifaceted process, and one of the most crucial steps is setting up your developer accounts on the platforms where you intend to distribute your app typically Google Play for Android apps and the App Store for iOS apps. If you’re new to mobile app development, you might find this step intimidating. Worry not, for this comprehensive guide will take you through each step required for setting up your developer accounts, so you can publish your apps without any hitches.
Google Play Developer Account: Your Passport to the Android World
1. Create a Google Account
If you already have a Google account, you’re good to go. If not, create one at accounts.google.com.
2. Sign Up for a Developer Account
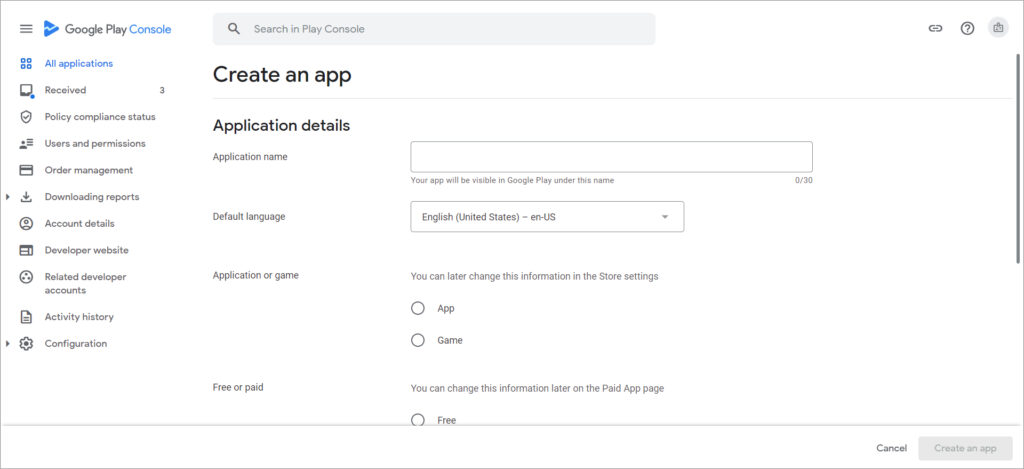
Navigate to the Google Play Console and click “Get Started” to sign up for a Developer account.
3. Pay the Registration Fee
Google charges a one-time fee of $25 to set up a developer account. Payments can usually be made using a credit or debit card.
4. Verify Your Account
After the payment, Google will send you a verification email. Open it and click the verification link.
5. Complete Your Account Details
Fill in your account details, including a developer name, which will be publicly visible on Google Play, and a contact email address.
6. Accept the Developer Agreement
You’ll be prompted to agree to Google’s Developer Distribution Agreement, a necessary step to proceed.
7. Enable Two-Step Verification
To enhance security, Google may ask you to enable 2-Step Verification.
8. Submit for Review
In specific regions, Google may require you to submit your account for a review process. Google will inform you if this step is necessary.
Apple App Store Developer Account: Breaking into the iOS Ecosystem
1. Create an Apple ID
Create an Apple ID if you don’t have one, and make sure it’s associated with your business email.
2. Obtain a D-U-N-S® Number
Before enrolling as a business, you’ll need a D-U-N-S® Number, a unique identifier for businesses issued by Dun & Bradstreet. The process can take some time, so plan in advance.
What is the D-U-N-S® Number?
The D-U-N-S® Number stands as a unique nine-digit identifier dedicated to pinpointing business entities on a location-specific criterion. Entrusted and overseen by Dun & Bradstreet (D&B), this number is universally acknowledged as a foundational business identifier.
Why Do You Need a D-U-N-S® Number for Apple Developer Program?
Apple harnesses the D-U-N-S® Number to scrutinize the identity and the legal standing of your establishment. This assessment is a part of the vetting procedure when applying to the Apple Developer Program or the Apple Developer Enterprise Program. It’s pivotal to understand that while numerous business types might be eligible for a D-U-N-S® Number, your enterprise must be legally recognized (like a corporation, limited partnership, or a limited liability company) to be bound by the Apple Developer Program’s legal terms and agreements. Entities such as DBAs, fictitious businesses, trade names, and branches won’t be accepted.
Moreover, while companies and educational institutions are mandated to offer a D-U-N-S® Number aligned with their legal entity, government organizations are exempted. Individual enrollees need not provide a D-U-N-S® Number.
How to Request a D-U-N-S® Number?
- You might be unaware, but D&B could have already allocated a free D-U-N-S® Number to your organization. Before you dive into the enrollment process, it’s wise to search here for your organization to verify if you’re already in possession of a D-U-N-S® Number.
- If your search yields no results, you’re presented with the option to relay your business details to Dun & Bradstreet to obtain a complimentary D-U-N-S®Number.
During this application, you’d need to furnish the subsequent details:
– Legal entity name.
– Address of the headquarters.
– Mailing address.
– Your professional contact information.
Do bear in mind that, as an integral part of D&B’s vetting procedure, a representative might reach out to glean more intricate details about your enterprise, such as the nature of your business or employee count. Ensure you have all the official business documents at the ready.
- 3. After dispatching a request for a D-U-N-S® Number, practice patience. It might take up to 5 business days for D&B to bestow your number. Hastening the D-U-N-S® Number issuance won’t abridge this waiting tenure. If your application lingers beyond two weeks, it’s advisable to contact D&B.
- 4. To revamp your D&B profile, direct an email to D&B. Remember, it might take a maximum of two business days for D&B to relay the updated data to Apple.
Encountering Enrollment Issues?
If, during enrollment, you’re presented with the message, “Your organization is not listed as a legal entity,” it’s indicative of two possibilities:
- The business details you’ve entered are recorded in the D&B database but under a different legal status, like a sole proprietorship.
- The legal status hasn’t been corroborated. During the enrollment, always utilize the legal entity name of your establishment. Apple refutes the inclusion of DBAs, fictitious businesses, trade names, or branches for company/organization registration. If your business holds the status of a sole proprietorship or a single-person business, enroll as an individual. If you’re convinced that your business should be legally recognized, arm yourself with all the official business documents and drop an email to D&B. They require these comprehensive business registration documents to authenticate your organization’s legal stature.
In conclusion, the D-U-N-S® Number, while might seem like just another administrative step, plays a pivotal role in ensuring the integrity and legitimacy of businesses in the Apple ecosystem. With this guide, you are now well-equipped to navigate this particular stage of your app development journey. Best of luck!
3. Enroll in the Apple Developer Program
Visit the Apple Developer Program enrollment page and click on “Start Your Enrollment.”
4. Choose Your Entity Type
Select ‘Company/Organization’ when asked to identify your entity type.
5. Submit Business Documents and D-U-N-S® Number
During enrollment, input your D-U-N-S® number for verification and any other documents like a Business License or Articles of Incorporation.
6. Pay the Enrollment Fee
The annual fee for the Apple Developer Program is $99. The accepted payment methods may vary depending on your region.
7. Verification
Apple will review your application and may even require a verification phone call.
8. Accept the Developer Agreement
Once approved, agree to Apple’s Developer Agreement to proceed.
9. Enable Two-Factor Authentication
Security is paramount, so make sure you enable Two-Factor Authentication on your Apple ID.
10. Access Program Resources
Post-approval, you’ll gain access to Apple’s array of development resources.
11. Generate Developer Certificate
You’ll need a developer certificate to sign your apps, obtainable via Xcode or the Apple Developer Center.
Conclusion
Setting up developer accounts on Google Play and the App Store may seem like a bureaucratic maze, but it’s a pivotal step that unlocks the doors to marketplaces brimming with millions of potential users. By adhering to this guide, you can seamlessly traverse this process and emerge ready to introduce your apps to the world. Happy coding! And if at any point you feel overwhelmed or uncertain, don’t hesitate to contact us.